
Tethering for Pro Studio Photography: A How-To Guide
Improve studio workflow! Learn tethering, gear, storage, color calibration for efficient pro photography.
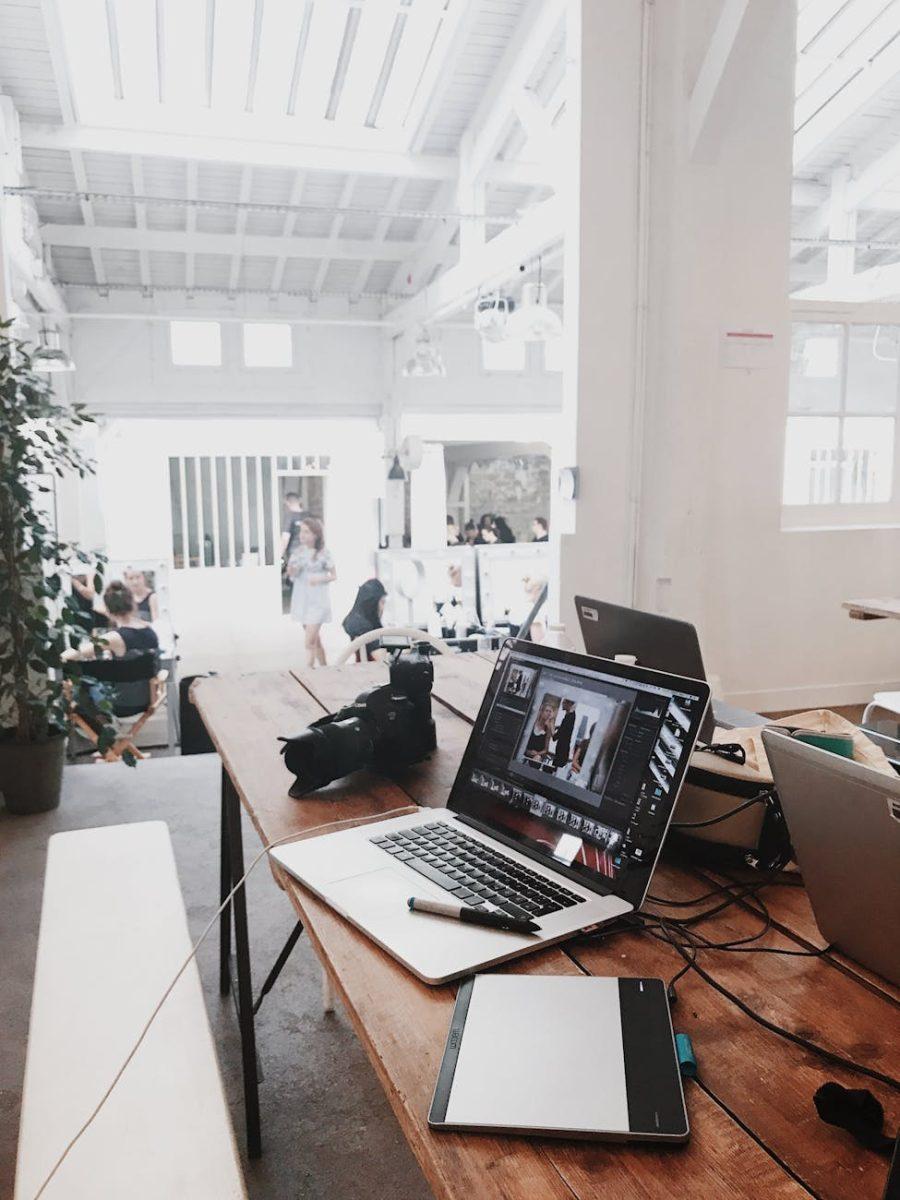
In the fast-paced world of studio photography, efficiency and collaboration are key to success. Tethered shooting, combined with a well-optimized workflow, can significantly reduce turnaround times, improve image quality, and enhance the client experience. This guide dives deep into the world of tethering and workflow gear, providing actionable insights to elevate your studio photography game.
The Power of Tethered Shooting in the Studio
Tethered shooting involves connecting your camera directly to a computer during a shoot. This seemingly simple connection unlocks a wealth of benefits that can transform your studio workflow.
Real-Time Image Review: See What You’re Capturing, Instantly
One of the most significant advantages of tethering is the ability to view images on a large screen as they are captured. This allows you to assess composition, lighting, and focus with far greater accuracy than looking at the camera’s small LCD. No more squinting and guessing – you see exactly what you’re getting, allowing for immediate adjustments and refinements.
Consider a scenario: you’re shooting a product campaign and need to ensure consistent color accuracy across all images. Tethering allows you to instantly identify any color discrepancies on a larger, calibrated monitor, enabling you to tweak your lighting or camera settings on the spot. This proactive approach saves time and ensures high-quality results from the outset.
Precise Focusing: Nail the Sharpest Images Possible
Achieving critical focus is paramount in photography. Tethering often allows you to zoom in on captured images with far greater magnification than the camera’s LCD allows. This makes it easier to identify and correct any focusing errors, ensuring that your images are tack sharp where they need to be. Many tethering software solutions also provide focus peaking tools to further enhance accuracy.
For example, when shooting portraits, you can zoom in on the subject’s eyes on the tethered screen to confirm that the focus is perfectly sharp. This level of precision is invaluable for delivering professional-quality results.
Client Collaboration and Instant Feedback: A Collaborative Approach
Tethered shooting fosters a collaborative environment, allowing clients and art directors to provide immediate feedback during the shoot. Instead of waiting for post-production, they can see the images in real-time, express their preferences, and suggest adjustments. This collaborative approach not only speeds up the process but also ensures that the final images align with their vision.
Imagine you’re working on a fashion shoot. The stylist can review the images on the tethered screen and make adjustments to the model’s clothing or accessories. The art director can provide feedback on posing and composition. This collaborative dialogue ensures that everyone is on the same page, leading to a more efficient and satisfying creative process. According to studies, collaborative design processes significantly increase client satisfaction (Nielsen Norman Group).
Enhanced Control and Camera Settings Adjustments
Many tethering software solutions allow you to control camera settings directly from your computer. This includes aperture, shutter speed, ISO, white balance, and even triggering the shutter. This level of control streamlines the shooting process and eliminates the need to constantly reach for the camera.
Essential Tethering Equipment: Building Your Tethered Shooting Setup
To embark on your tethered shooting journey, you’ll need the right equipment. Here’s a breakdown of the essential components:
Tethering Cables: The Lifeline of Your Connection
The tethering cable is the physical link between your camera and computer. Choosing the right cable is crucial for a reliable and fast connection. Consider the following factors:
- Cable Type: USB-C is the modern standard, offering faster transfer speeds and greater power delivery compared to older USB versions like USB 2.0 or 3.0. Ensure your camera and computer both support USB-C for optimal performance.
- Cable Length: Choose a cable length that provides sufficient reach without being excessively long, which can increase the risk of tripping or cable damage. 10-15 feet is often a good starting point.
- Cable Quality: Invest in a high-quality cable specifically designed for tethering. These cables are built to withstand the rigors of studio use and minimize data transfer errors. Tether Tools is a reputable brand known for their durable and reliable tethering cables. (Tether Tools)
- Right Angle Adapters: Consider using right-angle adapters to reduce strain on the camera and computer ports, especially in tight spaces.
Computers: The Brains of Your Operation
Your computer is the central hub of your tethered shooting setup. Choose a computer with sufficient processing power, RAM, and storage to handle large image files and run tethering software smoothly.
- Processor: A multi-core processor (e.g., Intel Core i5 or AMD Ryzen 5 or better) is recommended for handling image processing and software tasks.
- RAM: 16GB of RAM is a good starting point, but 32GB or more is preferable for demanding workflows and high-resolution images.
- Storage: A fast solid-state drive (SSD) is essential for quick image transfer and software performance. Consider a 512GB or 1TB SSD for your primary drive.
- Display: A color-accurate monitor is crucial for accurate image review. Invest in a monitor that covers a wide color gamut (e.g., Adobe RGB or DCI-P3) and can be calibrated regularly.
Tethering Software: The Interface for Control and Collaboration
Tethering software provides the interface for controlling your camera, viewing images, and collaborating with clients. Popular options include:
- Capture One: A professional-grade photo editing and tethering software known for its powerful processing capabilities and advanced features. (Capture One)
- Adobe Lightroom Classic: A widely used photo editing software that also offers robust tethering capabilities. (Adobe Lightroom Classic)
- digiCamControl: A free and open-source tethering software that supports a wide range of cameras. (digiCamControl)
- Camera-Specific Software: Many camera manufacturers offer their own tethering software, such as Canon’s EOS Utility and Nikon’s Camera Control Pro. These can offer deep integration with specific camera models.
The best software for you will depend on your specific needs and workflow. Consider factors such as camera compatibility, features, and ease of use. Most software providers offer free trials, allowing you to test the software before committing to a purchase.
Alternative Tethering Solutions: Wireless and Beyond
While wired tethering is the most reliable option, wireless tethering is becoming increasingly popular for its flexibility and convenience. Other alternative solutions also exist.
Wireless Tethering: Untethered Freedom
Wireless tethering eliminates the need for a physical cable, allowing you to move freely around the studio. This can be particularly useful for shooting in tight spaces or when working with multiple cameras. However, wireless tethering can be less reliable than wired tethering and may experience lag or dropped connections.
Several options exist for wireless tethering:
- Built-in Wi-Fi: Many modern cameras have built-in Wi-Fi capabilities that allow you to connect to a computer or mobile device wirelessly.
- Wireless Transmitters: Devices like the CamRanger and Case Air offer dedicated wireless tethering solutions with enhanced features and reliability.
- Software Solutions: Some tethering software, such as Capture One, offers wireless tethering capabilities with compatible cameras.
SD Card Alternatives: CFexpress and High-Speed Memory Cards
While not technically tethering, utilizing the fastest SD card alternative for your camera like CFexpress cards can drastically speed up image transfer during post production. Choose the fastest card your camera is compatible with to reduce offload times.
Consider your needs to decide if the added cost is worth the speed increase. A high speed SD card reader is also a necessity to get the most out of these fast cards.
Storage Solutions: Protecting Your Precious Images
Proper storage is essential for protecting your valuable image files. Implementing a robust storage solution will safeguard your work against data loss and ensure easy access to your images when you need them.
On-Site Storage: Local Backup and Redundancy
Having a reliable on-site storage solution is crucial for immediate backup and access to your images. Consider the following options:
- RAID Arrays: RAID (Redundant Array of Independent Disks) arrays provide data redundancy, protecting your images against drive failure. RAID 1 (mirroring) and RAID 5 (striping with parity) are common configurations for data protection.
- Network Attached Storage (NAS): NAS devices offer centralized storage and backup capabilities, allowing you to access your images from multiple computers on your network.
- External Hard Drives: External hard drives are a simple and affordable option for backup. However, it’s important to use multiple drives and rotate them regularly for redundancy.
Off-Site Storage: Disaster Recovery and Peace of Mind
Off-site storage provides an additional layer of protection against disasters such as fire, theft, or natural disasters. Consider the following options:
- Cloud Storage: Cloud storage services like Backblaze, Carbonite, and Amazon S3 offer secure and reliable off-site backup.
- Physical Off-Site Storage: Storing a backup drive in a separate location, such as a bank vault or a trusted friend’s house, provides physical protection against disasters.
The “3-2-1” backup rule is a widely recommended strategy: have at least three copies of your data, on two different media, with one copy stored off-site.
Workflow Optimization: Maximizing Efficiency in Post-Production
Optimizing your post-production workflow can significantly reduce turnaround times and improve the overall quality of your work. Here are some key areas to focus on:
Color Calibration: Ensuring Accurate Colors
Color calibration is essential for ensuring that the colors you see on your monitor are accurate and consistent. This is crucial for making informed editing decisions and delivering images that meet your clients’ expectations. Invest in a color calibration tool, such as a SpyderX or X-Rite i1Display Pro, and calibrate your monitor regularly (at least once a month).
Regular monitor calibration helps maintain color accuracy over time, as monitor performance can drift. Resources from the International Color Consortium (ICC) provide comprehensive information about color management. (International Color Consortium)
Image Culling and Organization: Streamlining Your Selection Process
Efficient image culling and organization can save you hours in post-production. Develop a system for quickly identifying and selecting the best images, and then organize them into folders based on subject, date, or other relevant criteria. Software like Photo Mechanic is specifically designed for rapid image culling and organization.
Presets and Actions: Automating Repetitive Tasks
Presets and actions allow you to automate repetitive editing tasks, such as applying basic adjustments or creating specific effects. Create your own presets or download pre-made presets from reputable sources. This can significantly speed up your workflow and ensure consistency across your images.
Actions in Photoshop or Presets in Lightroom can be saved and applied to multiple images with just a few clicks, saving a huge amount of time when processing similar images from a shoot.
Hardware Optimization: Investing in Speed
Faster hardware leads to a faster workflow. Upgrading components like your computer’s RAM, SSD, and graphics card can dramatically improve the speed of editing tasks. Invest in the best hardware you can afford to maximize your productivity.
Consider upgrading to the latest generation of processors and graphics cards for improved performance, especially when working with large image files or complex edits.
By investing in the right tethering and workflow gear, and by implementing efficient workflow practices, you can transform your studio photography and deliver exceptional results to your clients. The initial investment pays off through increased efficiency, improved image quality, and a more collaborative and enjoyable creative process. Furthermore, improved turnaround times can lead to increased client bookings and revenue. If you need additional consultation on specific gear or workflow optimization strategies, many experienced consultants are available to guide your studio towards success.
This article was optimized and published by Content Hurricane.
Ready to build the real thing?
When you're ready for a done-for-you studio, book a discovery call and we'll map a build that fits your space.