
Studio Lighting Essentials: Gear Guide for Photographers
Master studio photography! Discover key lighting gear: strobes, softboxes, reflectors & techniques. Elevate your images now!
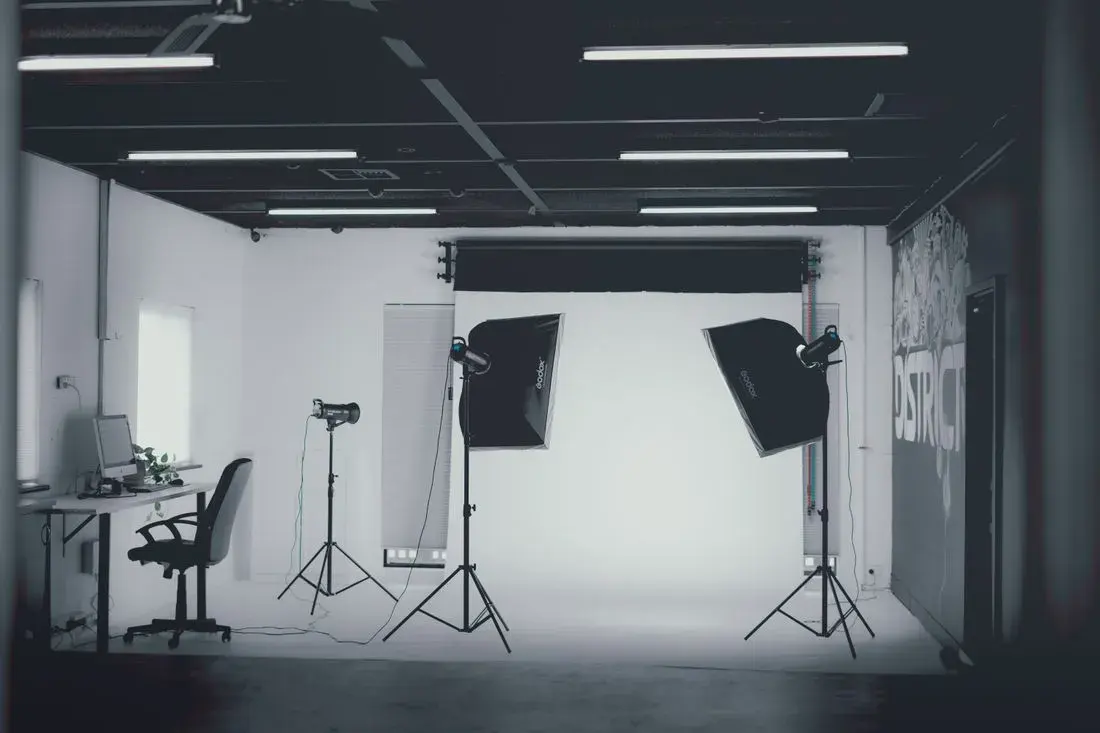
Why Lighting Matters: More Than Just Illumination
Think of light as the sculptor of your images. It shapes form, reveals texture, and sets the mood. Without carefully controlled lighting, even the best camera will struggle to produce the results you envision. Effective lighting elevates your photos from simple snapshots to works of art. Understanding the characteristics of light – its intensity, color, direction, and quality (hard vs. soft) – is the foundation of great studio photography. Consider the work of legendary portrait photographers like Irving Penn or Annie Leibovitz; their mastery of light is as integral to their style as their subject matter. (See a compilation of Penn’s work on The Metropolitan Museum of Art’s website).
Types of Studio Lighting: Choosing the Right Tools
There are two primary types of lighting for studio photography: continuous lights and strobes. Each has its advantages and disadvantages, making them suitable for different situations and skill levels.
Continuous Lighting: WYSIWYG Lighting
Continuous lights provide a constant source of illumination, allowing you to see the effect of the light in real-time – “What You See Is What You Get” (WYSIWYG). This makes them excellent for beginners and for video work.
- LED Panels: Energy-efficient, generate minimal heat, and offer adjustable color temperature and brightness. Ideal for portraits, product photography, and video. Brands like Aputure and Godox are popular choices. Look for CRI (Color Rendering Index) values above 95 for accurate color representation.
- Fluorescent Lights: A more budget-friendly option than LEDs, but less energy-efficient and can produce a noticeable flicker.
- Tungsten Lights: Powerful and produce a warm, pleasing light, but generate a significant amount of heat. Less common now due to their inefficiency and potential safety concerns.
Consider a scenario where you’re photographing jewelry. Using continuous lighting allows you to precisely position the lights and observe how they interact with the facets and textures of the piece in real-time, minimizing unwanted reflections and maximizing sparkle. This direct visual feedback is invaluable for achieving the desired result.
Strobes (Flash): Power and Control
Strobes, also known as flash units, emit a burst of intense light for a fraction of a second. They offer significantly more power than continuous lights, allowing you to use smaller apertures for greater depth of field and freeze motion. However, they require a bit more experience to master, as you can’t see the light before you take the picture (unless your strobe has a modeling light).
- Monolights: Self-contained units with their own power source, offering portability and flexibility. Popular brands include Profoto, Bowens, and Godox.
- Power Packs and Heads: A power pack provides the electricity for multiple flash heads, allowing for complex lighting setups.
- Speedlights (Hot Shoe Flashes): Smaller, battery-powered flashes that mount on your camera’s hot shoe. Can be used off-camera with triggers for studio work but are generally less powerful than monolights or power packs.
Imagine you’re photographing a dancer leaping in the air. The short burst of intense light from a strobe can freeze the motion, capturing every detail of the pose with exceptional clarity. This is difficult to achieve with continuous lighting, which may result in motion blur.
Essential Lighting Modifiers: Shaping the Light
Lighting modifiers are accessories that shape and control the light emitted from your light source. They’re essential for creating different moods and effects in your photos.
Softboxes: Diffused, Even Lighting
Softboxes create a soft, diffused light that minimizes harsh shadows and provides even illumination. They are a staple for portrait photography and product photography.
- Rectangular Softboxes: Mimic window light and are excellent for full-body portraits.
- Square Softboxes: Provide a more even light distribution and are suitable for smaller subjects.
- Octagonal Softboxes (Octaboxes): Create a round, flattering light that is ideal for headshots.
For example, when shooting a headshot, using a large octabox as your key light will wrap the subject’s face in soft, even light, minimizing wrinkles and blemishes and creating a more pleasing overall look. The larger the softbox relative to the subject, the softer the light.
Umbrellas: Affordable and Versatile
Umbrellas are a more affordable and portable alternative to softboxes. They come in two main types:
- Reflective Umbrellas: The light bounces off the inside of the umbrella, creating a wider, softer light.
- Shoot-Through Umbrellas: The light passes through the umbrella fabric, creating a more diffused light.
Umbrellas are great for creating fill light or for general illumination when you need a quick and easy setup. While they don’t offer the same level of control as softboxes, they’re a valuable addition to any studio.
Reflectors: Bouncing Light
Reflectors are simple, inexpensive tools that bounce light back onto your subject, filling in shadows and adding dimension.
- White Reflectors: Produce a soft, neutral light.
- Silver Reflectors: Create a brighter, more specular light.
- Gold Reflectors: Add a warm, golden tone to the light.
- Black Reflectors (Flags): Absorb light and create deeper shadows.
Imagine photographing a portrait outdoors on a sunny day. Using a silver reflector to bounce sunlight back onto the subject’s face can eliminate harsh shadows under the eyes and nose, resulting in a more flattering and professional-looking portrait.
Snoots and Grids: Focused Light
Snoots and grids are used to direct light into a narrow beam, creating dramatic highlights and shadows. They are often used for hair lights or for accentuating specific areas of a subject.
For example, in a product photography shoot, you could use a snoot with a grid to create a spotlight effect on a particular detail of the product, drawing the viewer’s eye to that specific feature.
Common Studio Lighting Setups: Building Your Foundation
Understanding basic lighting setups is crucial for creating consistent and professional results. Here are two fundamental setups to get you started:
3-Point Lighting: A Classic for Portraits
3-point lighting is a standard setup that uses three lights to illuminate the subject: a key light, a fill light, and a backlight (also known as a rim light or hair light).
- Key Light: The main light source, positioned to one side of the subject.
- Fill Light: Positioned on the opposite side of the key light, used to fill in shadows and reduce contrast. Typically less powerful than the key light.
- Backlight: Positioned behind the subject, used to separate the subject from the background and create a halo effect.
This setup provides balanced and flattering illumination, making it ideal for portraits and interviews. Experiment with the angles and distances of each light to achieve different looks.
Rembrandt Lighting: Dramatic and Evocative
Rembrandt lighting is characterized by a small triangle of light on the cheek opposite the key light. This technique creates a dramatic and evocative look, often used for portraits and fine art photography.
To achieve Rembrandt lighting, position the key light higher and to one side of the subject, creating a shadow that extends from the nose towards the cheek. Adjust the position and angle of the light until you see the characteristic triangle of light form on the cheek. This setup requires careful positioning and attention to detail.
Learning these setups provides a strong base, and experimenting with modifying them allows you to adapt to your style and subject.
Building Your Studio on a Budget: Affordable Options
Setting up a professional studio doesn’t have to break the bank. Here are some tips for building your studio on a budget:
- Start with the Essentials: Focus on acquiring a good quality key light and a reflector. You can always add more equipment later as your budget allows.
- Consider Used Equipment: Buying used lighting gear can save you a significant amount of money. Check reputable online marketplaces and local camera stores. However, carefully inspect used equipment for any damage or wear and tear.
- DIY Modifiers: You can create your own DIY modifiers using inexpensive materials like foam board, fabric, and cardboard.
- Rent Equipment: For occasional use, renting lighting gear is a cost-effective alternative to buying it.
Prioritize quality over quantity. A single, well-chosen light and a good reflector can often produce better results than a collection of cheap, poorly made lights.
Many photography schools offer affordable workshops or courses on studio lighting. Investing in your education can save you money in the long run by helping you avoid costly mistakes. Resources from universities like Yale’s Photography Department can be a great resource.
As you progress, you might find that the core services offered by a studio like ours can provide valuable support. Our expertise in equipment selection, setup, and maintenance can significantly streamline your workflow, allowing you to focus on the creative aspects of your work. We also offer custom lighting design consultations, tailored to the unique needs of each client’s studio space and creative goals.
Beyond the Basics: Advanced Lighting Techniques
Once you’ve mastered the fundamentals, you can explore more advanced lighting techniques to further enhance your studio photography:
- Color Gels: Use colored gels to add creative effects and mood to your images.
- Multiple Light Setups: Combine multiple lights to create complex lighting patterns and effects.
- High-Speed Sync (HSS): Use HSS to use your flash at faster shutter speeds, allowing you to shoot with wider apertures in bright light.
- Off-Camera Flash: Mastering off-camera flash opens up a world of creative possibilities, allowing you to position your lights exactly where you need them.
Continuously experimenting and refining your techniques is key to growth. Remember to document your settings and results to build your lighting “recipe book” for future reference.
Maintaining Your Lighting Gear: Longevity and Reliability
Proper maintenance is crucial for extending the life of your lighting equipment and ensuring reliable performance.
- Clean Your Lights Regularly: Dust and dirt can reduce the output and lifespan of your lights. Use a soft cloth to clean the lenses and reflectors regularly.
- Store Your Equipment Properly: Store your lights and modifiers in a cool, dry place, away from direct sunlight and moisture.
- Check Cables and Connections: Regularly inspect your cables and connections for any damage or wear and tear.
- Replace Bulbs as Needed: Replace bulbs when they start to dim or flicker.
Investing in high-quality cases and bags for your equipment will protect it from damage during transport and storage. A little preventative maintenance can save you a lot of money and headaches in the long run. Regular professional servicing can also identify and address potential issues before they become major problems, ensuring your equipment remains in optimal condition.
This article was optimized and published by Content Hurricane.
Ready to build the real thing?
When you're ready for a done-for-you studio, book a discovery call and we'll map a build that fits your space.